
Google AI Pro 크레딧으로 유료 키 쓰기Use Google AI Pro credit for a paid key
Google AI Pro의 월 $10 크레딧을 Google Cloud 결제에 연결해 Gemini API 유료 등급을 씁니다. Nalmeok에서는 Batch 처리에 씁니다. Connect the monthly $10 Google AI Pro credit to Google Cloud billing and use the paid Gemini API tier. In Nalmeok, it powers Batch processing.
사진은 한국어 화면 기준입니다. 영어 화면의 버튼 이름은 괄호에 적었습니다. Screenshots show the Korean interface. English button names are in parentheses.
-
Google Developer Program 가입
Google Developer Program에 접속해 Join the program을 누르고 Google AI Pro를 구독 중인 계정으로 로그인합니다. 프로그램 가입은 무료입니다.
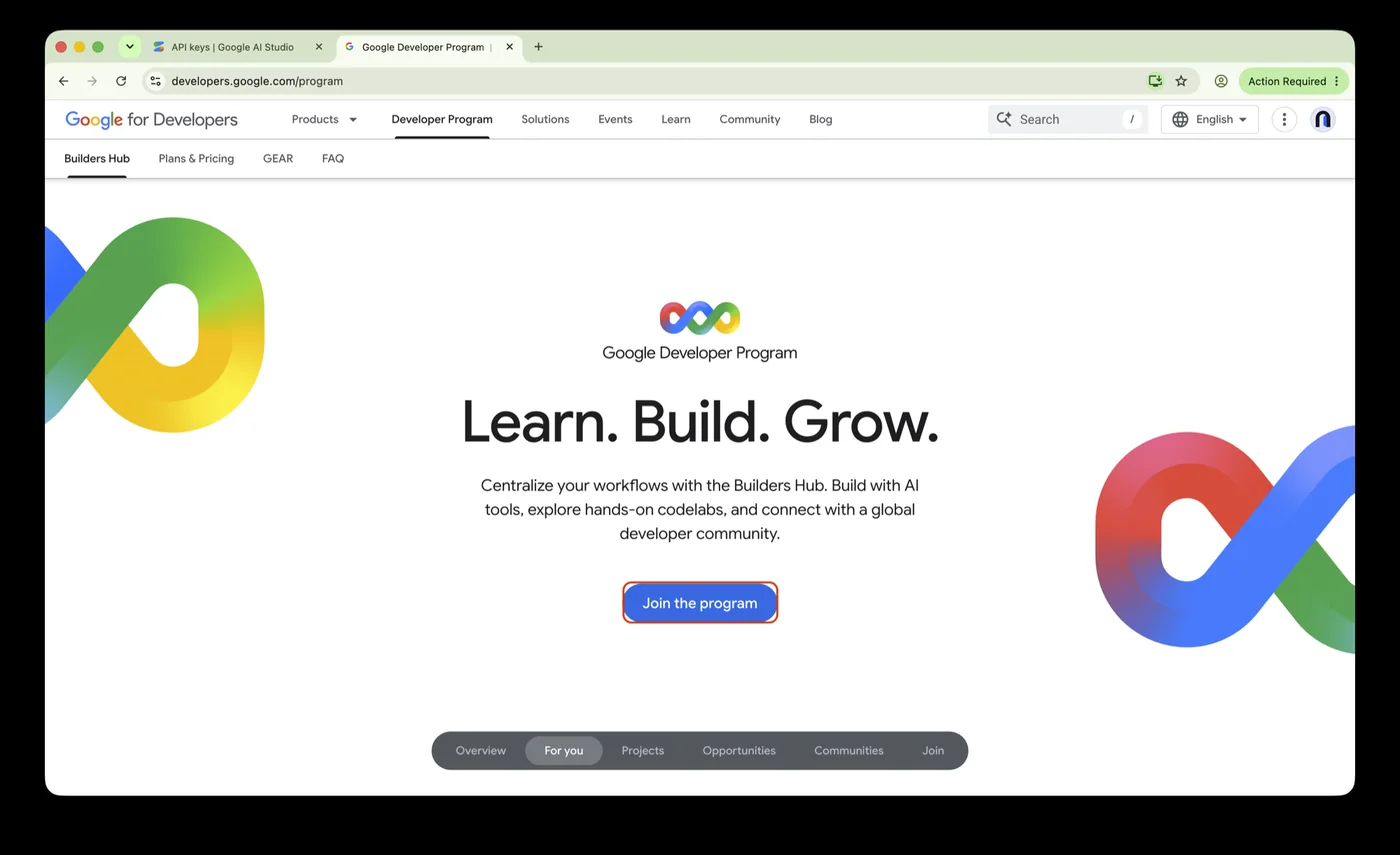
사진 1 — Google Developer Program 홈페이지 -
개발자 프로필 만들기
처음 가입하면 프로필 생성 화면이 나옵니다. 프로그램 참여를 누르고 이름과 프로필 정보를 입력한 뒤 프로필 만들기를 누릅니다. 프로필 공개와 이메일 수신 여부는 원하는 대로 고릅니다.
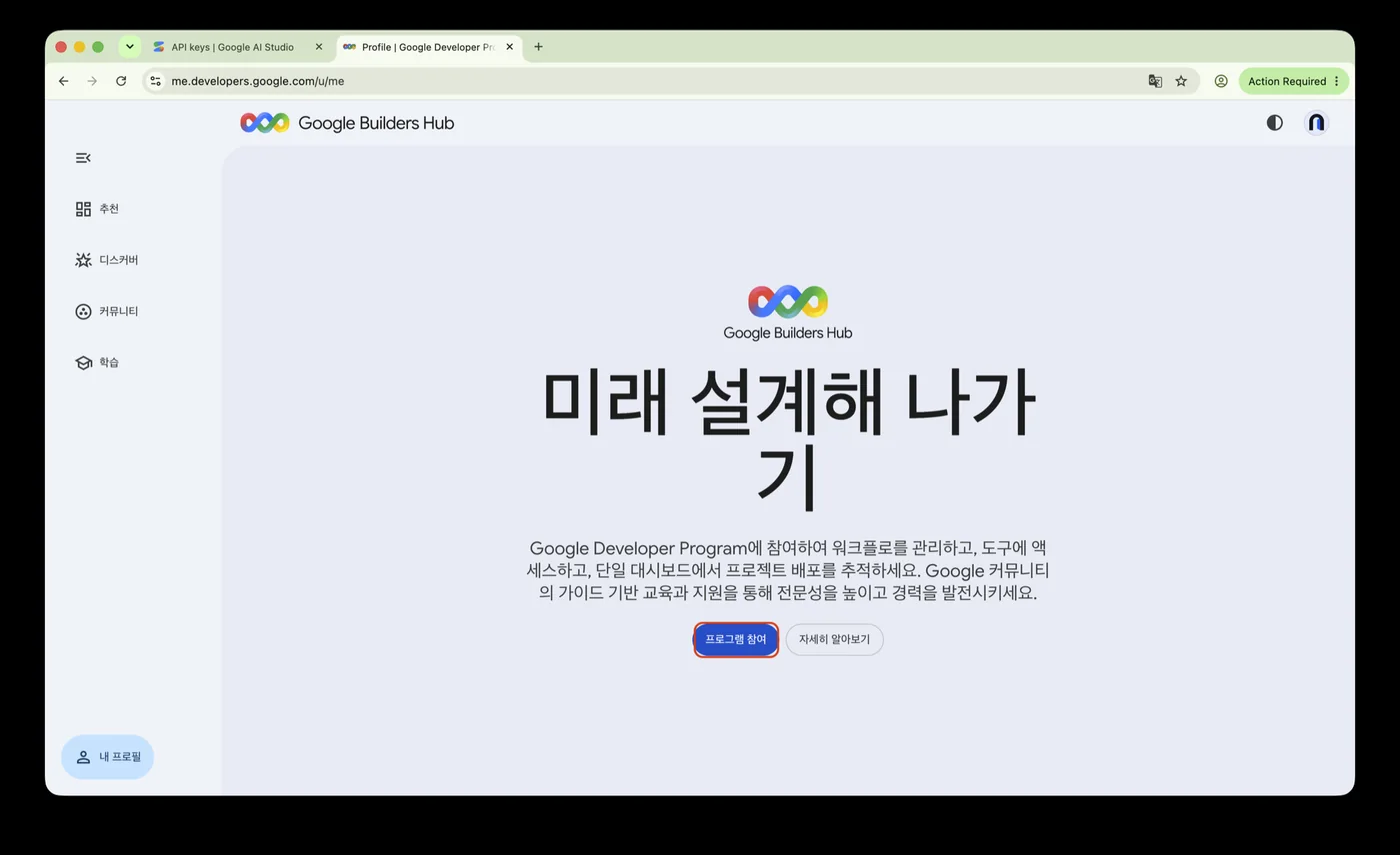
사진 2 — 프로그램 참여 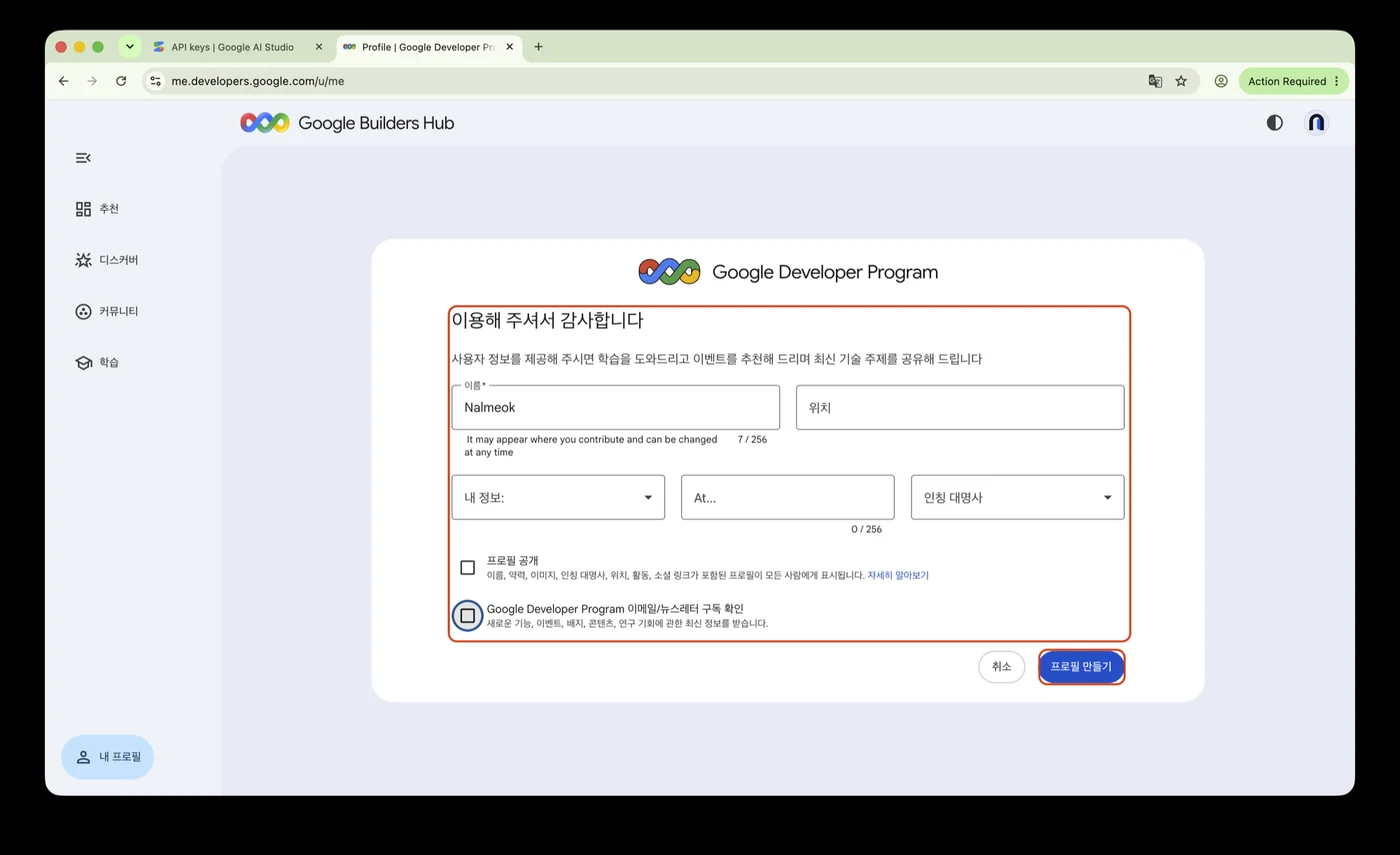
사진 3 — 개발자 프로필 만들기 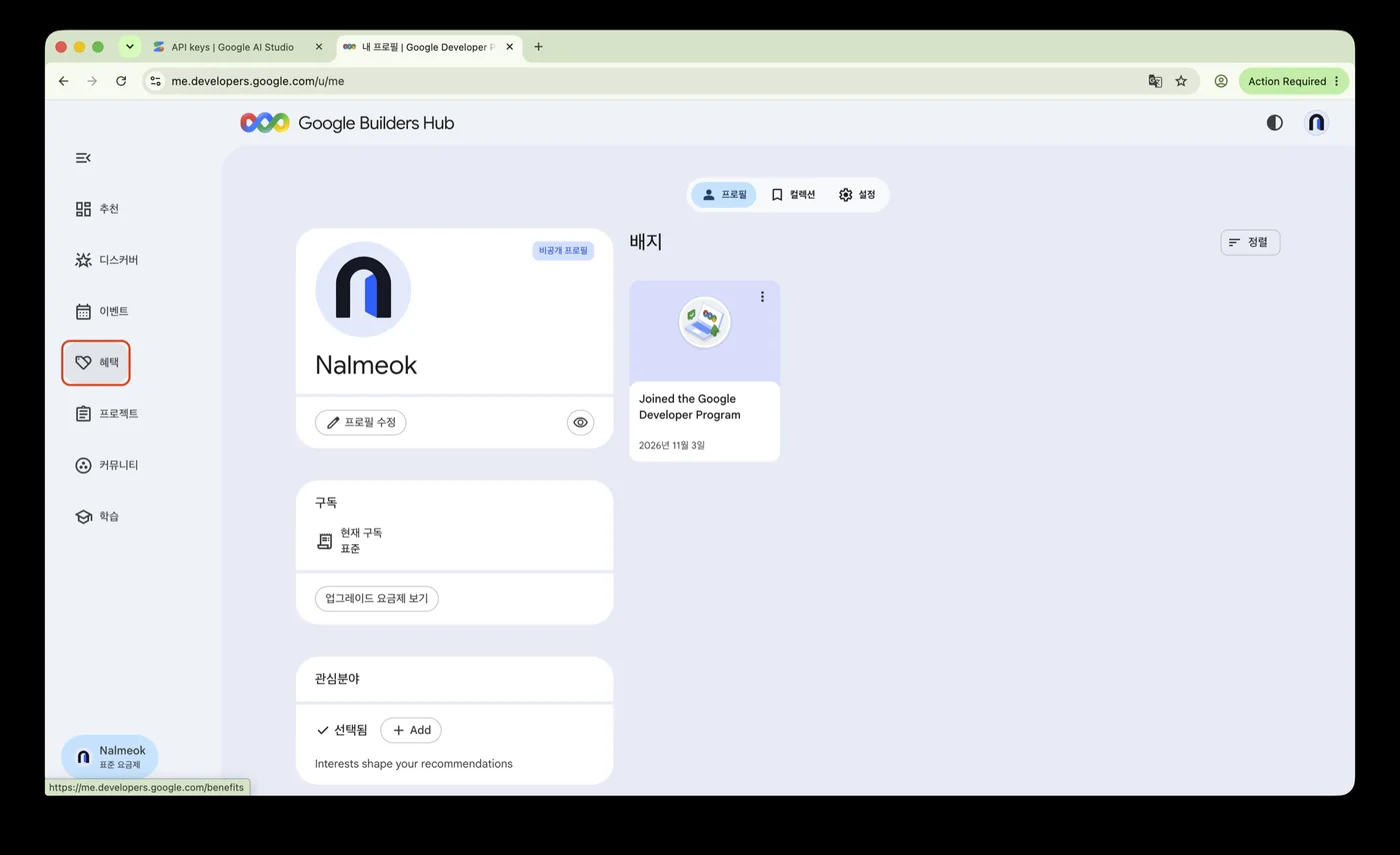
사진 4 — 가입 완료 -
월 $10 크레딧 확인
Google Builders Hub의 왼쪽 메뉴에서 혜택(Benefits)을 엽니다. Premium 탭에서 월간 생성형 AI 및 Cloud 크레딧 카드를 확인합니다. 한국 계정은 원화(예: ₩13,433)로 표시되고, 만료일과 연결된 결제 계정, 남은 잔액이 함께 나옵니다.
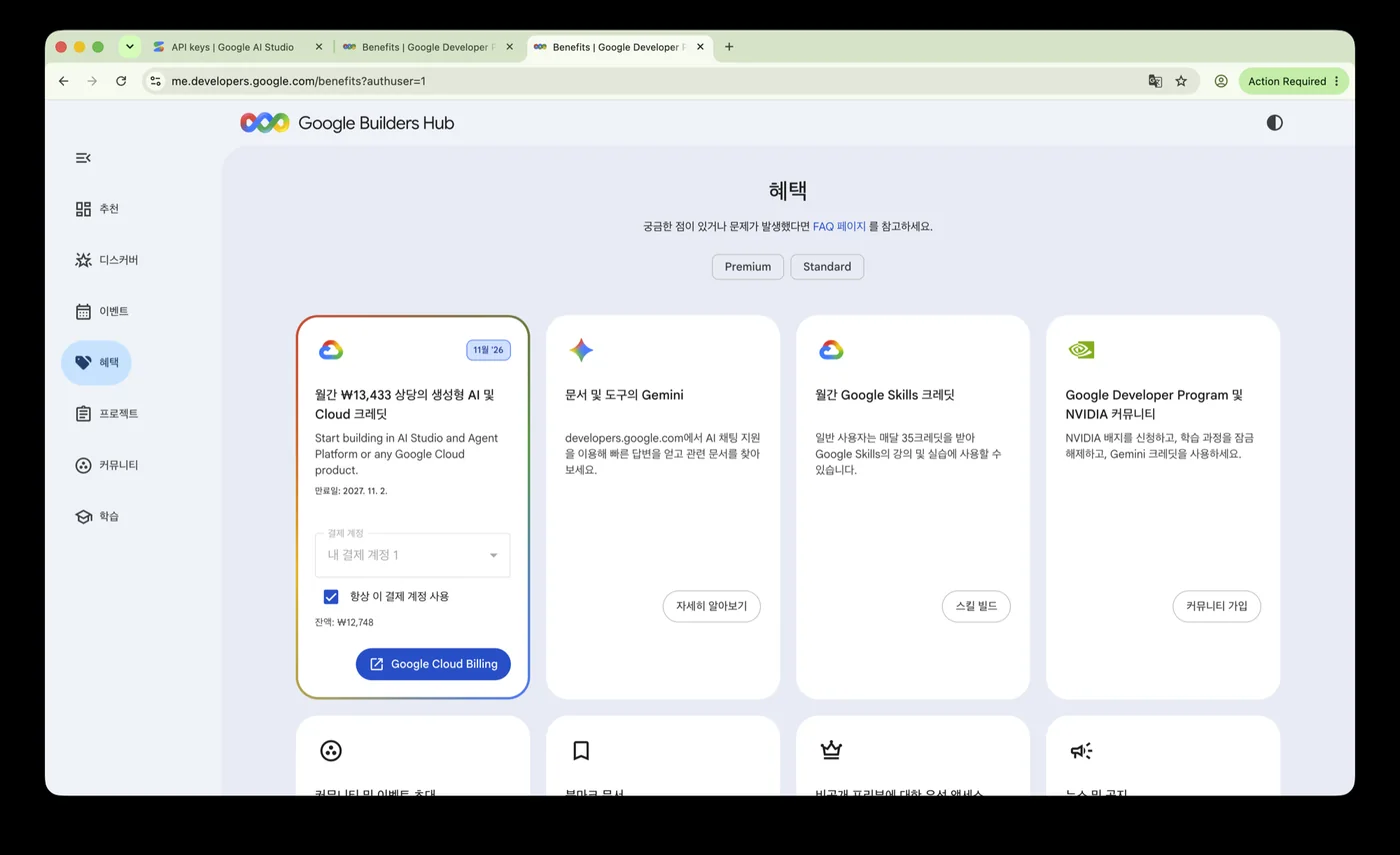
사진 5 — Premium 혜택과 월간 크레딧 -
Google Cloud 크레딧 활성화
카드에서 결제 계정을 고릅니다. 처음이라면 안내에 따라 Google Cloud 결제 계정을 만들거나 기존 계정을 고릅니다. 항상 이 결제 계정 사용을 체크하면 다음에도 같은 계정을 씁니다. 카드 아래에 잔액과 만료일이 보이면 크레딧이 활성화된 상태입니다.
크레딧에는 만료일이 있습니다. 혜택 카드에 표시된 기간을 확인하세요.
-
Gemini API 유료 결제 설정
API 키 관리에서 사용할 프로젝트의 키 줄에 있는 결제 설정을 누릅니다. Cloud Billing 계정 설정 창에서 앞서 크레딧을 연결한 계정(예: 내 결제 계정 1)을 고르고 계속을 누릅니다. 계정이 없으면 새 결제 계정 추가로 만듭니다.
처음 유료 등급을 설정하면 결제 수단 등록과 최소 $5 선불 충전이 필요할 수 있습니다. 활성 선불 잔액이 있으면 Google Cloud 크레딧이 선불 잔액보다 먼저 적용됩니다.
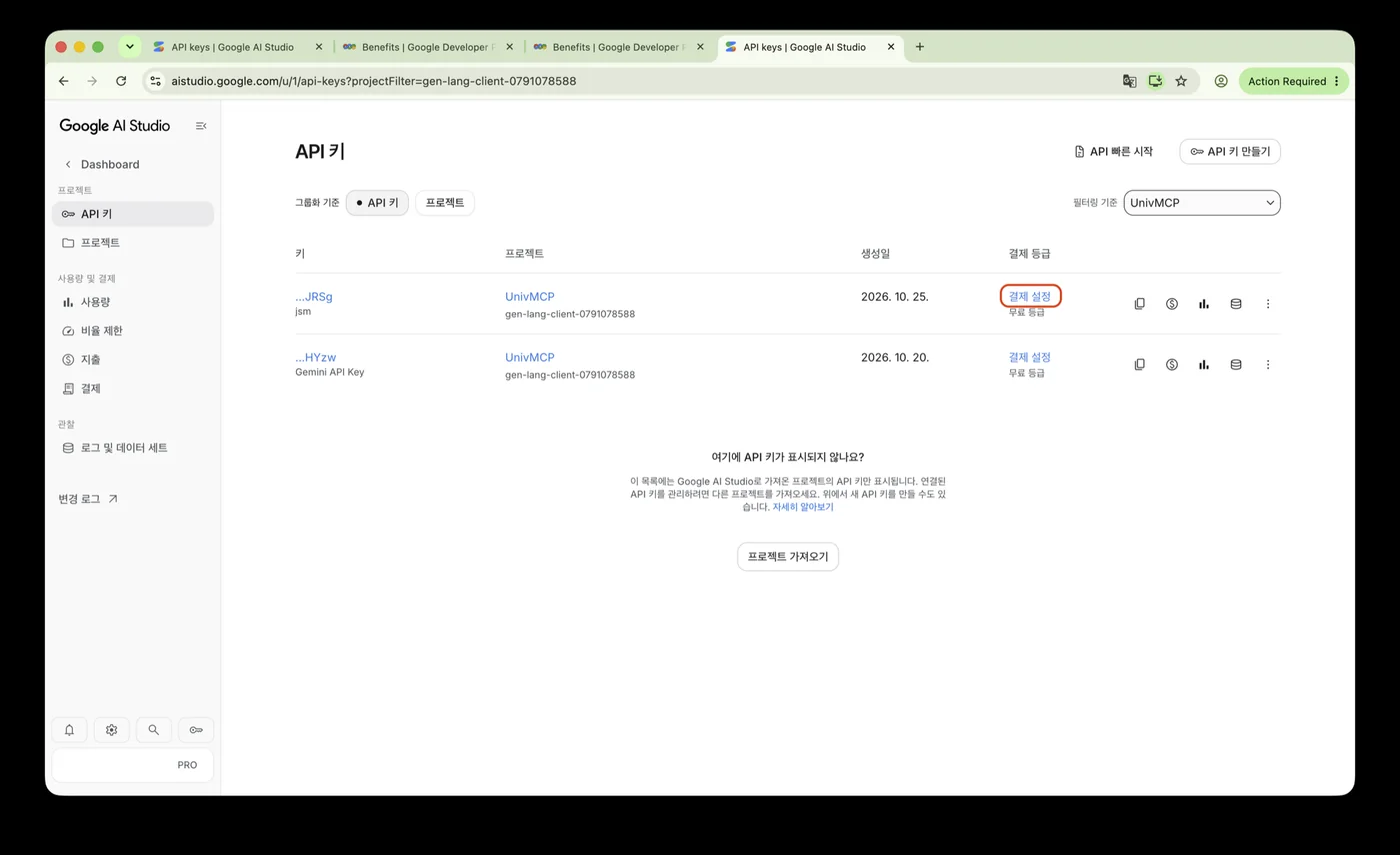
사진 6 — API 키 줄의 결제 설정 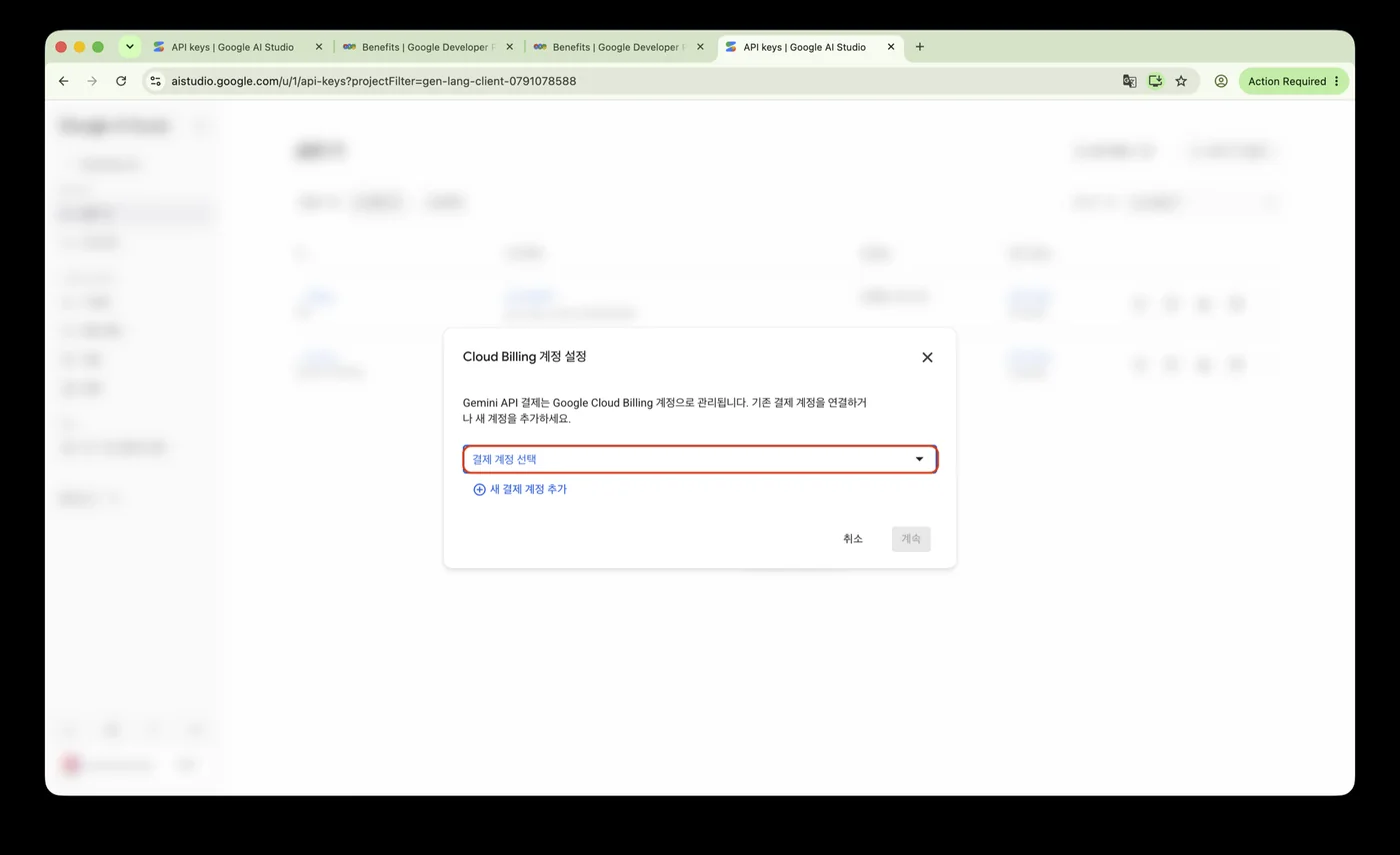
사진 7 — Cloud Billing 계정 설정 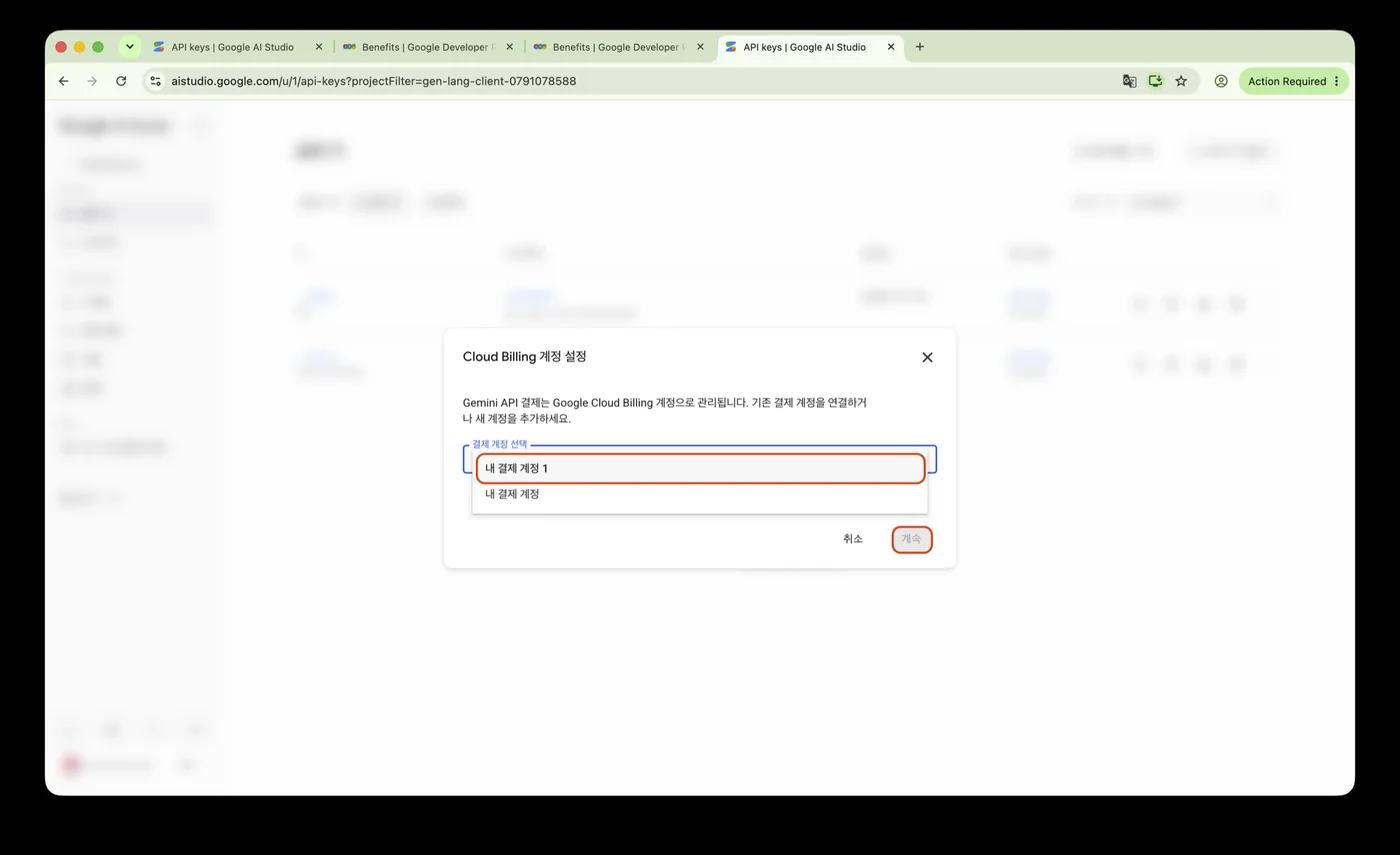
사진 8 — 결제 계정 선택 후 계속 -
API 키 발급과 Nalmeok 등록
API 키 만들기를 눌러 이름(예:
Nalmeok)을 넣고 유료 결제가 연결된 프로젝트를 고릅니다. 키 만들기를 누르고 발급된 키를 복사합니다. Nalmeok의 API 키(영어 화면 API keys) 화면에서 유료(Paid)를 고르고 API 키 붙여넣기(Paste an API key)에 키를 넣은 뒤 저장(Save)을 누릅니다. 목록에 키가 나오면 완료(Done)로 닫습니다.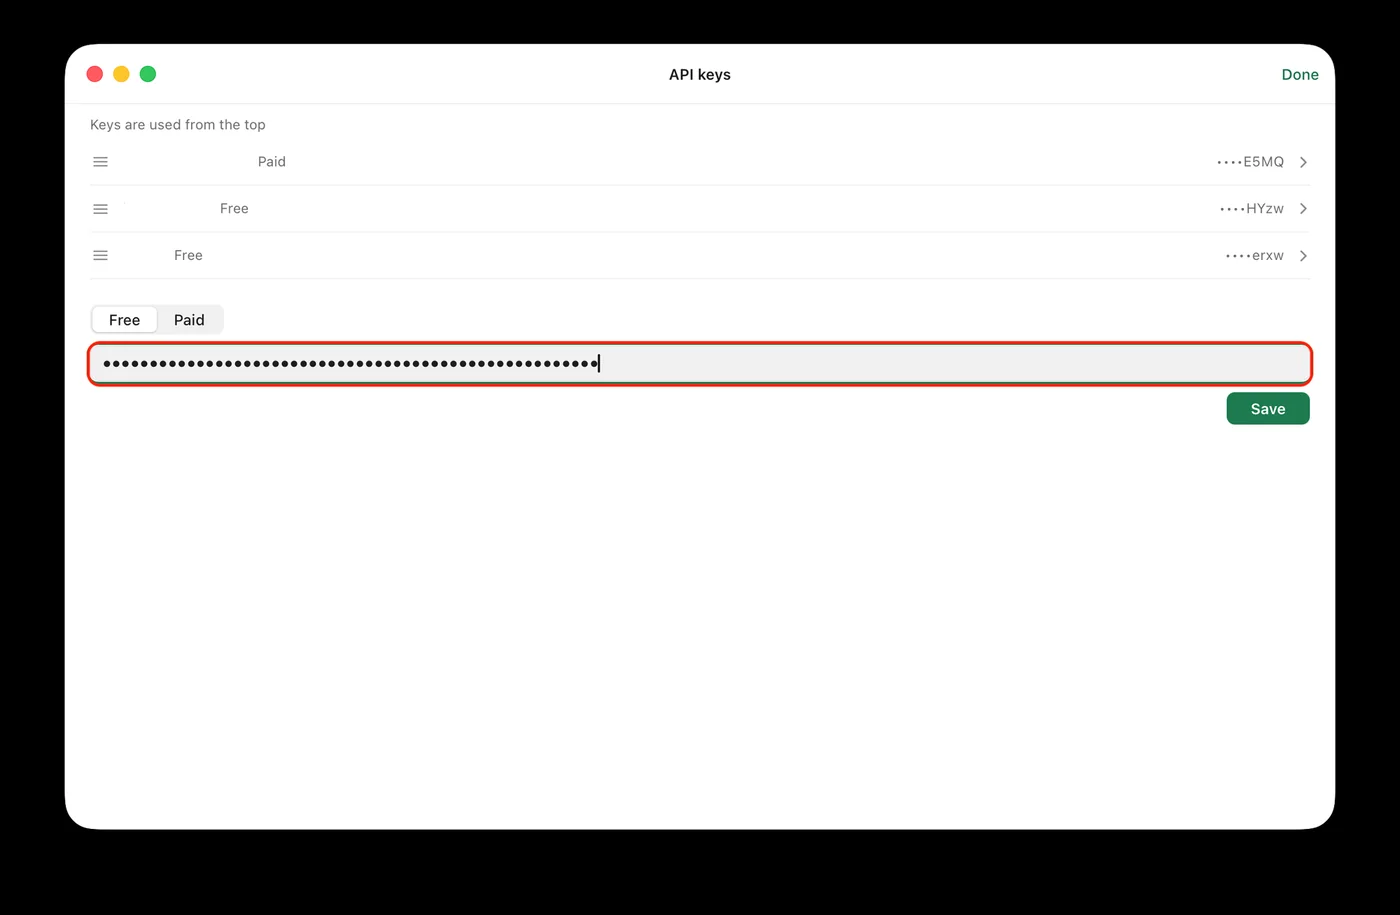
사진 9 — Nalmeok API 키 화면 유료 키는 Batch(대기 후 처리)에 씁니다. 1시간 오디오에 약 74원이고, 결과는 보통 10분~1시간 뒤에 나옵니다. 앱을 닫아도 Google 서버에서 계속 진행됩니다. 무료 키 설정은 무료 Gemini API 키 발급을 참고하세요.
-
Join the Google Developer Program
Open the Google Developer Program, choose Join the program, and sign in with the account that has Google AI Pro. Joining is free.
Photo 1 — Google Developer Program -
Create a developer profile
On the first visit, you get a profile setup screen. Choose Join the program, enter your name and profile details, and choose Create profile. Choose your profile visibility and email preferences.
Photo 2 — Joining the program
Photo 3 — Creating a developer profile
Photo 4 — Profile complete -
Check the monthly credit
In Google Builders Hub, open Benefits in the left menu. On the Premium tab you see the monthly generative AI and Cloud credit card. Korean accounts show the amount in won (for example, ₩13,433) along with the expiry date, linked billing account, and remaining balance.
Photo 5 — Premium benefits and monthly credit -
Activate the Google Cloud credit
Choose a billing account on the card. If this is your first time, create a Google Cloud billing account or choose an existing one. Check Always use this billing account to reuse it. The credit is active when the card shows a balance and an expiry date.
The credit expires. Check the period shown on the benefit card.
-
Set up paid billing for the Gemini API
Open API keys and choose Set up billing on the key row for the project you want to use. In Cloud Billing account settings, choose the account linked to the credit and choose Continue. If no account appears, choose Add a new billing account.
The first paid setup may require a payment method and a $5 minimum prepaid deposit. An active prepaid balance is applied after Google Cloud credits.
Photo 6 — Billing setup on the API key row
Photo 7 — Cloud Billing account settings
Photo 8 — Choosing the billing account -
Create a key and add it to Nalmeok
Choose Create API key, enter a name (for example,
Nalmeok), and select the project with paid billing. Choose Create key and copy it. In Nalmeok, open API keys (Korean: API 키), choose Paid (Korean: 유료), paste the key into Paste an API key (Korean: API 키 붙여넣기), and choose Save (Korean: 저장). Choose Done (Korean: 완료) when the key appears.
Photo 9 — Nalmeok API keys screen Paid keys use Batch processing. A one-hour recording costs about 74 won and usually returns in 10–60 minutes. Closing the app does not stop the job; Google keeps processing it. For the free-key setup, see Get a free Gemini API key.
자주 묻는 질문
- 매월 $10를 따로 결제해야 하나요?
- $10 크레딧은 Google AI Pro 구독에 포함된 혜택입니다. Gemini API 유료 등급을 처음 활성화할 때는 별도 선불 충전이 필요할 수 있습니다.
- 크레딧을 모두 쓰면 어떻게 되나요?
- 연결된 결제 계정의 일반 요금이 적용됩니다. 사용량과 지출 한도를 확인하세요.
- 이미 발급받은 무료 키를 그대로 쓸 수 있나요?
- API 키의 무료·유료 등급은 키가 아니라 연결된 Google Cloud 프로젝트의 결제 상태로 정해집니다. 기존 프로젝트에 결제를 연결하면 그 키도 유료 등급으로 쓸 수 있습니다. Nalmeok에서 유료를 골라 다시 등록하세요.
- Google AI Pro와 Gemini API는 별개인가요?
- Google AI Pro는 Google의 AI 구독이고, Gemini API는 앱에서 Gemini 모델을 호출하는 서비스입니다. Pro 구독에는 Gemini API 등에 쓸 수 있는 월간 Cloud 크레딧이 포함됩니다.
Questions
- Do I pay $10 separately each month?
- The $10 credit is included in the Google AI Pro subscription. The first paid Gemini API setup may require a separate prepaid deposit.
- What happens when the credit runs out?
- The normal rates for the linked billing account apply. Check your usage and spending limits.
- Can I use my existing free key?
- The free or paid tier belongs to the Google Cloud project linked to the key, not the key itself. Connect billing to the existing project and the key can use the paid tier. In Nalmeok, choose Paid and add it again.
- Are Google AI Pro and Gemini API the same?
- Google AI Pro is Google's AI subscription; Gemini API is the service apps use to call Gemini models. Pro includes a monthly Cloud credit that can be used for Gemini API.